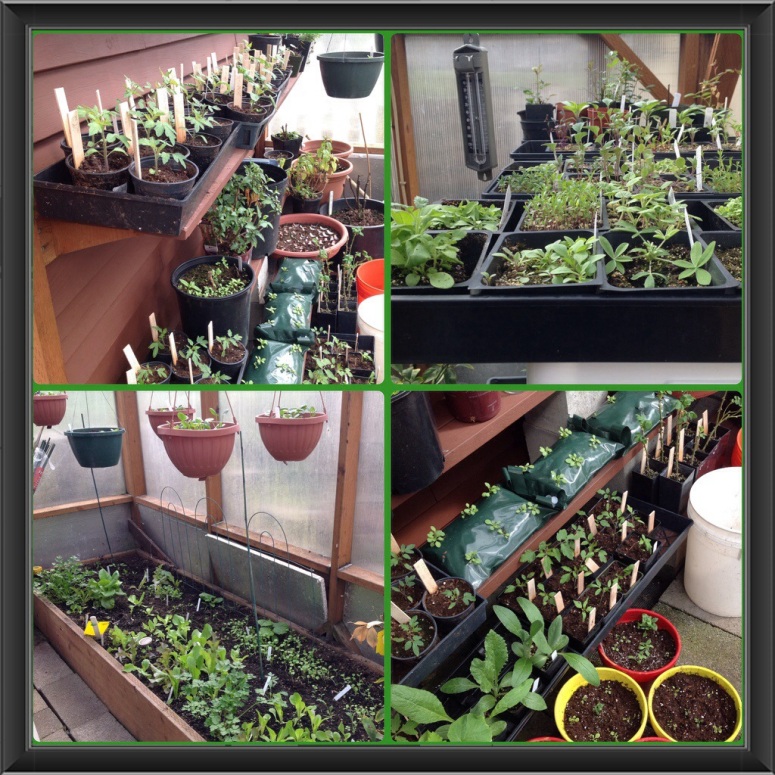
Tomatoes today May 26, 2018

The tomatoes love the Walls of Water! Started from seeds February 15 the transplanted up to 4 inch pots then on March 31, into the WOW. Now, May 26 they are showing out the top.

The weather is still cool at night so I am not ready to lift off the WOW and replace with tomato cages.

The next photo will show the difference between the WOW tomatoes and some extras I planted directly in the ground on the same date, just to compare what would happen.

Having fun with tomatoes

I just love getting my hands dirty with transplanting. It is such a time of hope. Good food in a few months. The remainder of these tomatoes are for the Central Valley Garden Club plant sale in early May.  Until then they will be toasty warm in my greenhouse.

Plants for Pollinators Among the Peas

Every fall I sow crimson clover cover crop to avoid rain compacted soil in spring. Most of the crimson clover gets turned in around February 15th a few weeks before sowing Cascadia Sugar Snap Peas and Oregon Sugar Snap II. I always leave a few of these plants to get to the bloom stage and hope that the bloom time coincides with the pea blooms. This year I have seen the first pea blooms today from seeds sown March 14. That date is several weeks later than usual in my Western Washington raised beds but this past winter was a record wet winter and I feared planting earlier would result in rotting seeds. I am happy that I waited this year because now the peas are ready to bloom. 

Unwelcome visitor

This year I planted about 24 bean seeds three times. The first time the soil was too cold and they did not germinate. I think the same thing happened the second time. I have a tendency to rush the season, beans are cheap and I only plant 24 since I am feeding two people now. The third time, around the very end of May, they actually germinated and grew and I harvested them twice, but then Sunday night my husband forgot to close the gate and I did not check and overnight the open gate welcomed a deer into my garden. Deer love beans. It/they snacked on a few roses but totally took out the beans.

image

Garlic scapes

A recent #gardenchat discussion got me thinking about garlic scapes and how I use them.

20140624-213752-77872441.jpg
I cut them now, as seen in the photo, before they flower and make pesto, just substituting garlic scape for basil. This will freeze easily in small cubes, if you have a plastic cube tray or as blobs on a lined freezer tray. Then put them in a Ziplock freezer bag for storage.

Another easy use for garlic scapes are as a substitution for green onions in a salad or as a very mild garlic when garlic is called for in a recipe.

The remainder of the stem and garlic bulb are left in the ground to dry and cure as usual.

Slug resistant garden containers

I love growing in my raised bed veggie gardens and sometimes the slugs love my veggies too. The smaller the starts, the easier they are to be destroyed. So last fall I found some copper tape on clearance and figured out that the roll contained just enough to encircle two plastic “flower boxes” and enough to surround the drainage holes on the bottom. This has been very successful! I have basil and a few lettuce plants that are growing in this prime real estate. When I want a few lettuce leaves to put on a sandwich, I do not want Swiss cheese lettuce.

20140526-131511-47711305.jpg

Greenhouse Action

Assorted lettuce seedings transplanted to greenhouse bed.

Assorted lettuce seedings transplanted to greenhouse bed.

It’s Spring inside my greenhouse. Starting February 15th we get ten hours of sunlight and that is my daily minimum to support growth. I always start out with lettuce. The seeds were started indoors under lights with a heat mat around January 21 and were transplanted into the greenhouse bed this weekend.

I also have flower seedlings that are hardening off now and will be potted up soon.
Flower seedlings

Using what you grow

I’m almost starting to feel like a food blogger, but just realized that the last part of being a veggie gardener is the harvest 🙂 My butternut squash plants were purchased from the garden club plant sale. Thanks Mary Ann! The little $1.00 plant has given me 8 good-sized squash. Some will be stored for later use, but I am roasting one today. Simple, recipe with my comments below.

400* F oven roast for 30 to 45 minutes turning cubes every 15 minutes

1 butternut squash, cut in half, seeded and peeled and cut in one inch cubes. The potato peeler worked well, being only slightly more difficult than peeling a potato.

I put the cubes in a bowl sprinkled on some olive oil, salt and pepper and massaged the squash before putting it on the foil lined tray.

You can see that I got tired of peeling and chopping when I got to the bowl part of the squash so I massaged open squash with olive oil and the sprinkled a bit of cinnamon for a different taste.

20131018-130818.jpg

20131018-130909.jpg

What did you do with your harvested squash?